Introduction
A cutting list is one of the first documents a workshop needs after design. It translates the drawing into panels, dimensions, materials and useful production information.
For a craft workshop, the question is not only how to print a table. The useful goal is to stop rebuilding dimensions by hand, reduce errors, connect material choices to purchasing, and send a document to the workshop that remains linked to the latest design.
1. Why building a cutting list is essential
Without a reliable cutting list, the workshop has to re-read the drawing, recalculate dimensions and manually prepare orders. This creates delays and avoidable mistakes.
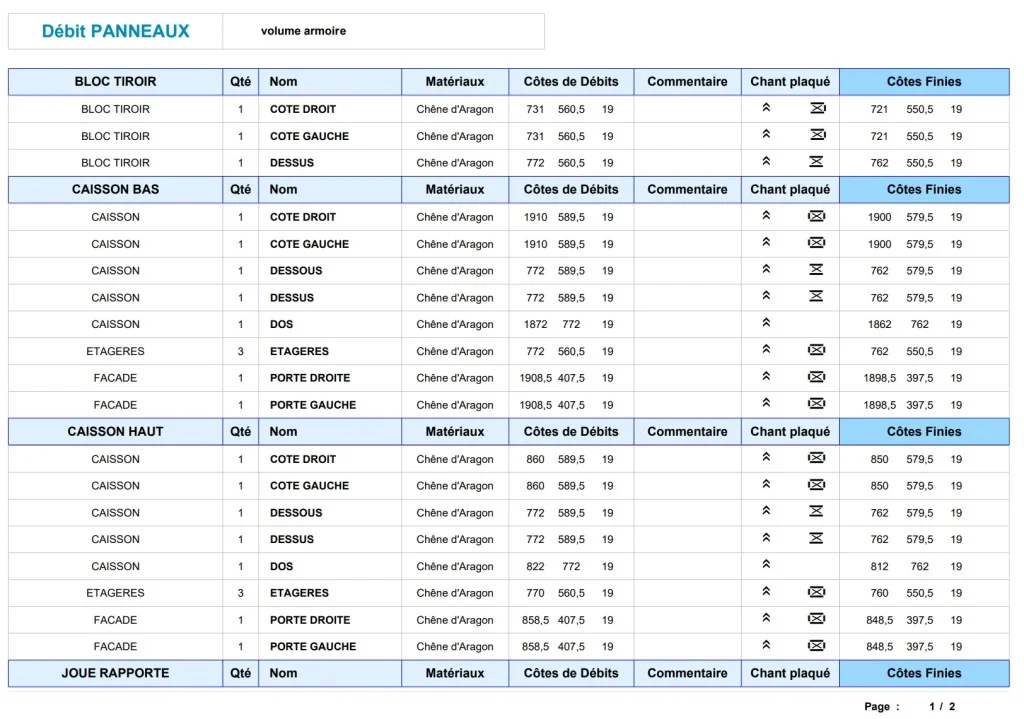
A good cutting list anticipates the parts to cut, the materials to order and the quantities to prepare. It can reduce offcuts, improve profitability and make communication clearer between the designer, the workshop and any cutting optimization software.
- →Material quantities become clearer.
- →Panel dimensions are easier to check.
- →Workshop preparation starts from structured data.
- →The customer project remains connected to production.
- →Purchasing and supplier references can be checked earlier.
- →The workshop receives a cleaner document with fewer interpretation gaps.
2. Steps to generate a first cutting list
The first step is to draw a simple but correctly structured project. Parts, groups and materials must be named in a way that makes sense for production.
The workflow starts with a simple project, but the method is already professional: use 3D copy and paste when it saves time, keep repeated elements consistent, and structure the file so each part can later be identified in the list.
Step 1: draw and structure the project
Create the furniture or fitting in 3D, then organize the components so each panel can be identified.
At this stage, the model must contain enough information for production: final length, width, thickness, material family and a clear relationship between the 3D object and its place in the furniture.
Step 2: assign materials and useful data
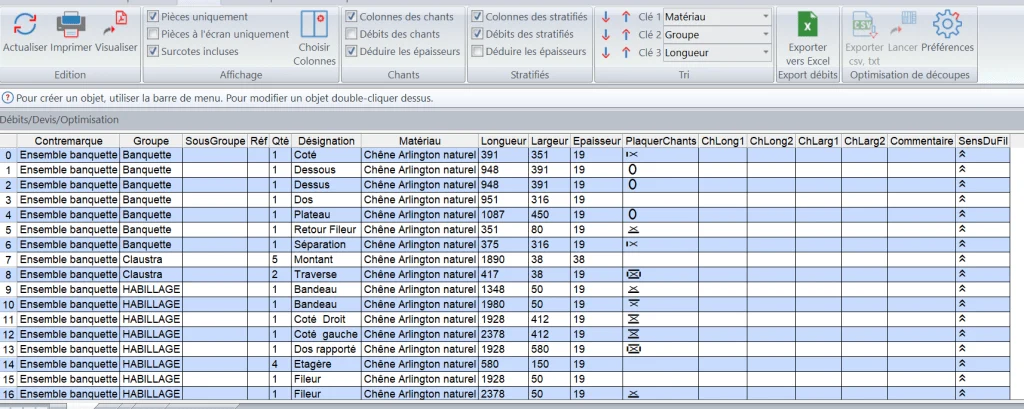
Material, thickness, grain direction, edges, oversizes and comments make the list usable by the workshop.
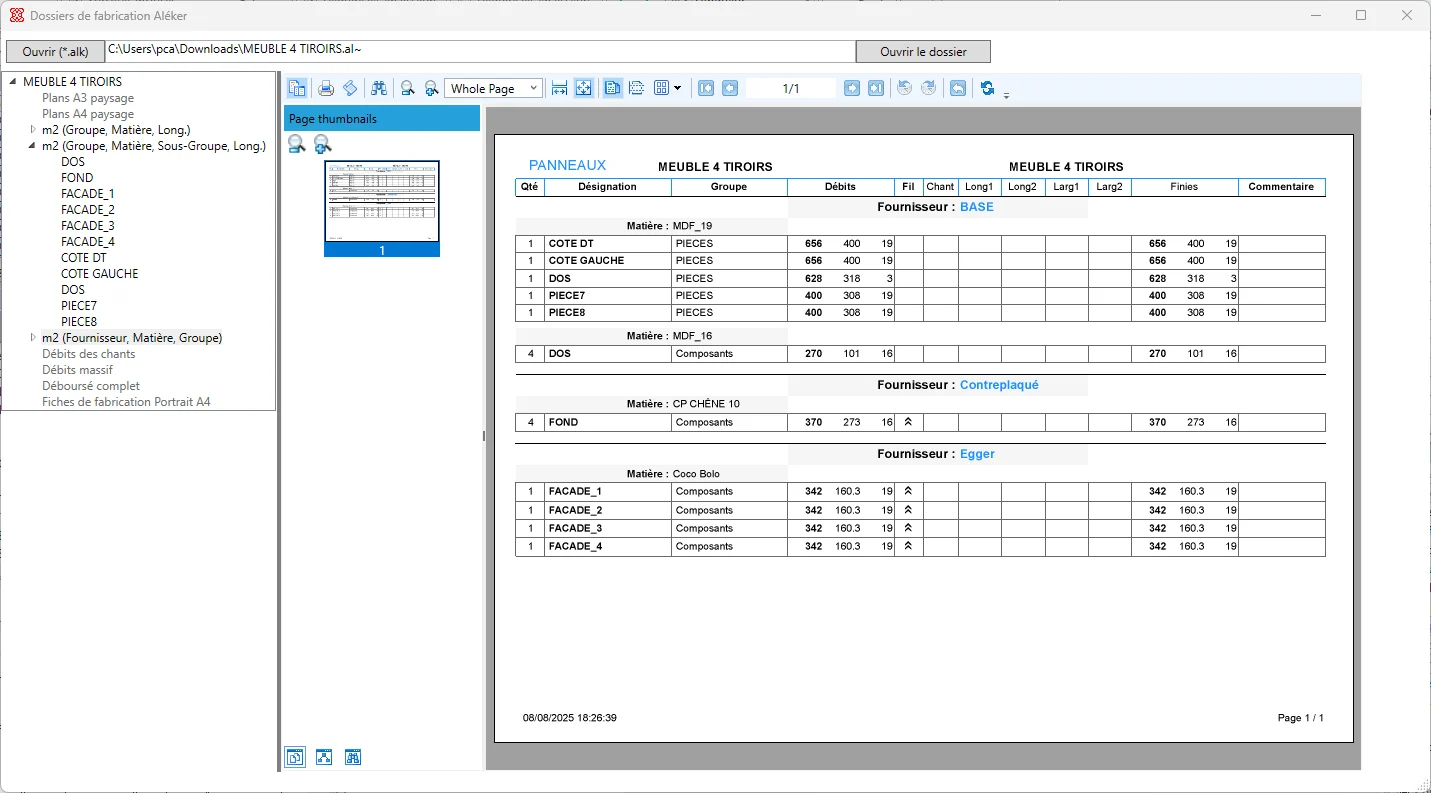
The supplier file can include prices, references, panel dimensions, commercial margins, edge information, hardware and even wood density when the workshop needs to estimate the weight of furniture.
Step 3: generate, check and export
Once the model is ready, the list can be generated, checked and exported for ordering, cutting, labels or further preparation.
The generated list still has to be reviewed: quantities, dimensions, materials, naming conventions, tolerances, oversizes and machining margins should be checked before the file reaches the saw, CNC workflow or optimization software.
3. Concrete benefits for the professional craftsperson
- →Less manual re-entry.
- →Fewer dimension errors.
- →Clearer workshop communication.
- →A more professional way to prepare production.
- →A document that can be shared with operators, suppliers or subcontractors.
- →Better visibility on material cost and project profitability.
- →A scalable method when the workshop handles variants or larger batches.
4. Why choose Aleker for this workflow
Aleker keeps the cutting list linked to the 3D project. When the drawing changes, the production information can follow the change instead of being rebuilt separately.
- →An interface designed around woodworking work rather than generic drawing.
- →Simple entry or import of components, materials and supplier data.
- →Exports that can be used for Excel, CSV, PDF or workshop preparation.
- →Enough flexibility to handle variants, options, offcuts and waste rules.
- →A workflow that can be adapted to the company's existing production method.
Conclusion
A first cutting list should be simple to create, but accurate enough to be useful. That is where a woodworking CAD workflow becomes valuable.
The return on investment comes from the repetition: fewer manual calculations, fewer cut parts to remake, cleaner exchanges with the workshop, and more time available for production or new customer projects.